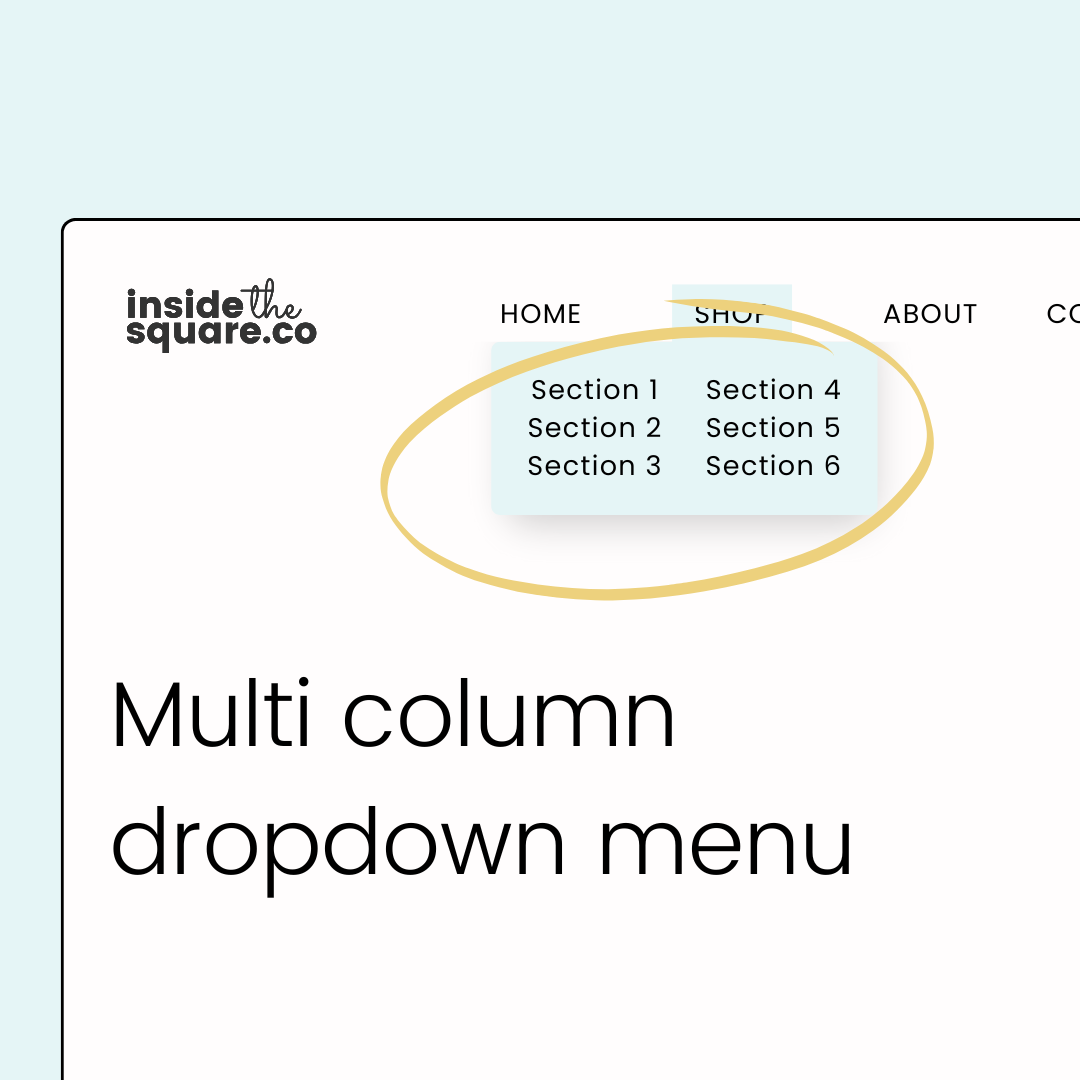
How to create a multiple-column dropdown in Squarespace

Here's what you'll find in this blog post:
→ Info about this tutorial
→ Video tutorial
→ Code example
→ Related content


About this tutorial

This tutorial was recorded using Squarespace 7.1 and these codes will not work on legacy sites built on version 7. For more information, visit insidethesquare.co/themes

We all know first impressions matter, and your website's navigation plays a huge role in that. But when you have a lot of links to share in a dropdown menu, a single-column layout can feel overwhelming for your website visitors. 😬 This free Squarespace tutorial is here to change the game!

In this tutorial, you'll learn the super simple code trick to creating a multi-column dropdown folder in Squarespace 7.1

The custom codes to create this multi-column dropdown are below. If you’re brand new to custom CSS, be sure to watch the tutorial video first so you can understand how to use them. I've also included some other codes below so you can change the colors, fonts, and alignment of your dropdown menu to match your brand aesthetic perfectly!


If this is your first time using CSS for Squarespace, awesome! 🙌 I have a lot more to teach you - check out my free class on basic CSS for Squarespace here: insidethesquare.co/learn


Video tutorial


Code Example

This is the main code that creates the two columns. Change the number 2 to the number of columns you want to have in your menu.

.header-nav-folder-content {column-count: 2}

You can use additional CSS to change the gap between the columns and add a line between them. Use this code below and adjust the gap value and the rule values to suit your site style:

.header-nav-folder-content {
column-count: 2;
column-gap: 30px;
column-rule: 3px dotted blue
}

You can customize the background color, add a border, and do much more with the dropdown menu! Here are some fun codes you can try:

Change the background color:

.header-nav-folder-content{background-color:#00FF00!important}

Give the drop down a gradient background:

.header-nav-folder-content{background:linear-gradient(to bottom, #fee7ef,#c4e9fa) }

Round the edges of the dropdown:

.header-nav-folder-content{border-radius:15px}

Change the link alignment to the left:

.header-nav-folder-content{text-align:left!important;}

Change the link alignment to the right:

.header-nav-folder-content{text-align:right!important;}

Change the link alignment to the center:

.header-nav-folder-content{text-align:center!important;}

Give your menu a border:

.header-nav-folder-content{border: 1px solid purple}

Add a border between links:

.header-nav-folder-content a {border-bottom:1px solid #333}

Increase the space between links:

.header-nav-folder-content a {padding-bottom:.5rem!important; }

Aaand last but not least, give that fancy little drop down a shadow with this code:

.header-nav-folder-content{box-shadow: 5px 5px 15px rgba(0,0,0,0.25)}

insidethesquare


Grab my collection of custom codes for Squarespace: 
→ insidethesquare.co/css

Learn CSS for Squarespace in my free class:
→ insidethesquare.co/learn

https://insidethesquare.co
Previous
Previous

How to use multiple fonts in your Squarespace announcement bar

Next
Next

How to customize a light box contact form in Squarespace