How to add an image inside an accordion block
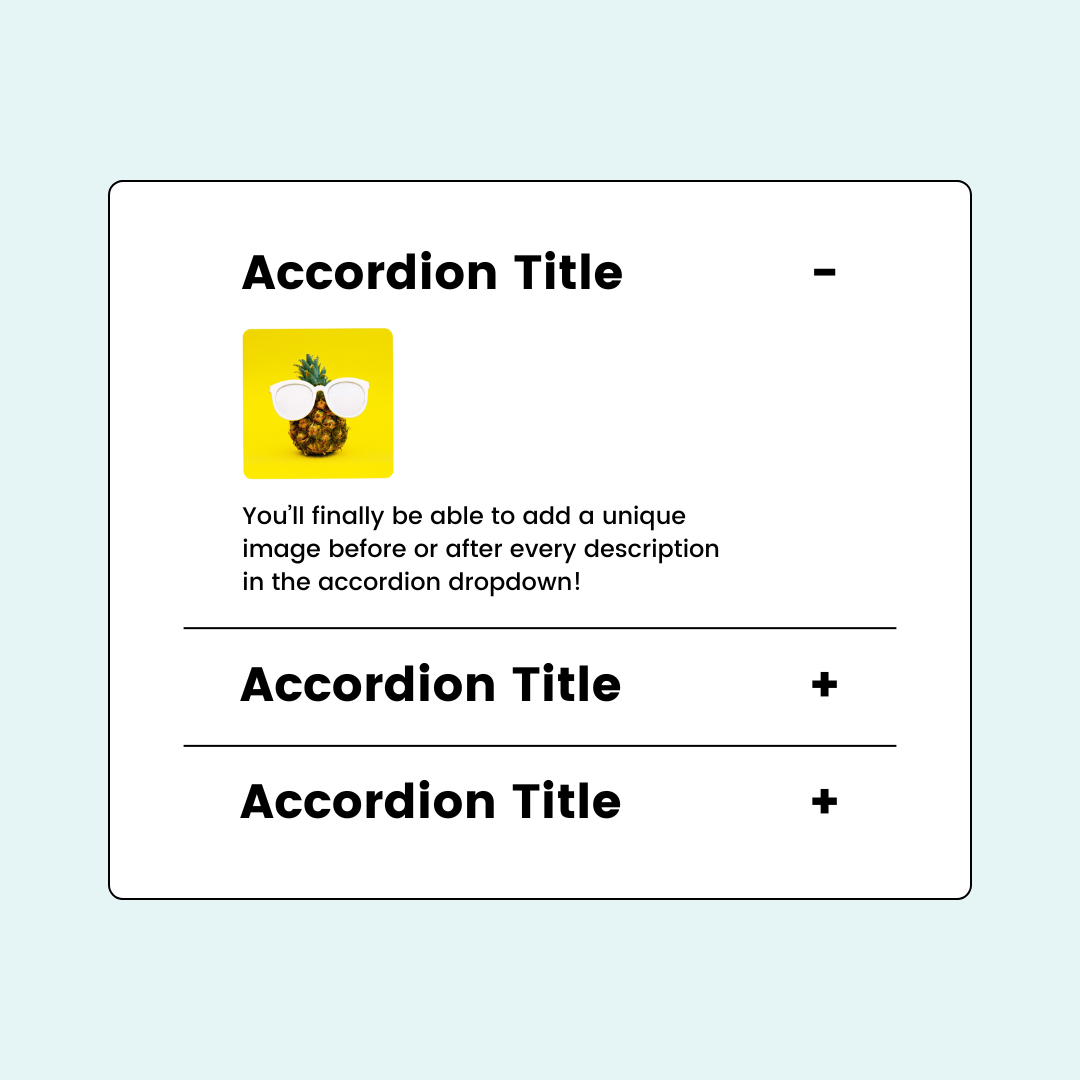
In this tutorial, we are going to place multiple images inside an accordion block and use custom code to change the size and placement so these images can be a perfect fit for your unique website style.
I’m not going to “sugar coat” this - it’s is kinda complicated.
First, we’ll add the images to our custom files in Squarespace. Hosting them with the rest of your content is a good habit to get in to 😉
Next, we’ll use custom code to create a space for content before the text in an accordion item description.
Then we’ll add the image as the background of the space we created.
After that, we’ll target the second item in the accordion, and give it a different background image.
I’ll also show you how to remove the image space from the third item in case you don’t want images in all of you accordions.
Finally, we’ll use some clever code to place the image next to the description, instead of above it, in case that style is better for your specific site.
Important update: Squarespace made changes to the program menu in May 2025. If your menu looks different than the video, press the / key to open the program search and search for Custom CSS to navigate there directly.
Here are the steps you’ll need to take to add an image to your accordion
Step 1: add the custom file to Squarespace
Step 2: use this code to create the space for your images
.accordion-item__description:before{
content:" ";
display:block;
width:90px; /*you can change this value */
height:90px; /*you can change this value */
background-image:url(add-image-url-here);
background-size:contain; /*you can change this value */
background-repeat:no-repeat; /*you can change this value */
}
Step 3: Update the placeholder text “add-image-url-here” with the URL for the image you uploaded. It will be visible as a dropdown in your CSS panel, or you can click on the custom files button to select it there.
Step 4: Target the second accordion by adding this code
.accordion-item:nth-child(2) .accordion-item__description:before{
background-image: url(add-image-url-here)!important
}
Optional: Repeat the above code for additional images and items, changing the number inside the parenthesis to the corresponding accordion item.
Optional: Add this code to remove the image container from any accordion blocks that don’t need it
.accordion-item:nth-child(3) .accordion-item__description:before{
content:none!important
}
Optional: Move the image to the left of the description content by adding this code. You’ll also want to add a margin-right to the original code to create space between the image and text:
.accordion-item__description{
display:flex!important
}
Well, that was a LOT of info! Here is the full code from the video:
.accordion-item__description:before{
content:" ";
display:block;
width:250px;
height:120px;
background-image:url(gus.jpg);
background-size:contain;
background-repeat:no-repeat;
margin-right:15px
}
.accordion-item:nth-child(2) .accordion-item__description:before{
background-image: url(shawn.png)!important}
.accordion-item:nth-child(3) .accordion-item__description:before{
content:none!important
}
.accordion-item__description{
display:flex!important
}