How to create a full screen sideshow in Squarespace
In this tutorial, you’ll learn how to build a slideshow landing page that grabs attention with changing images.
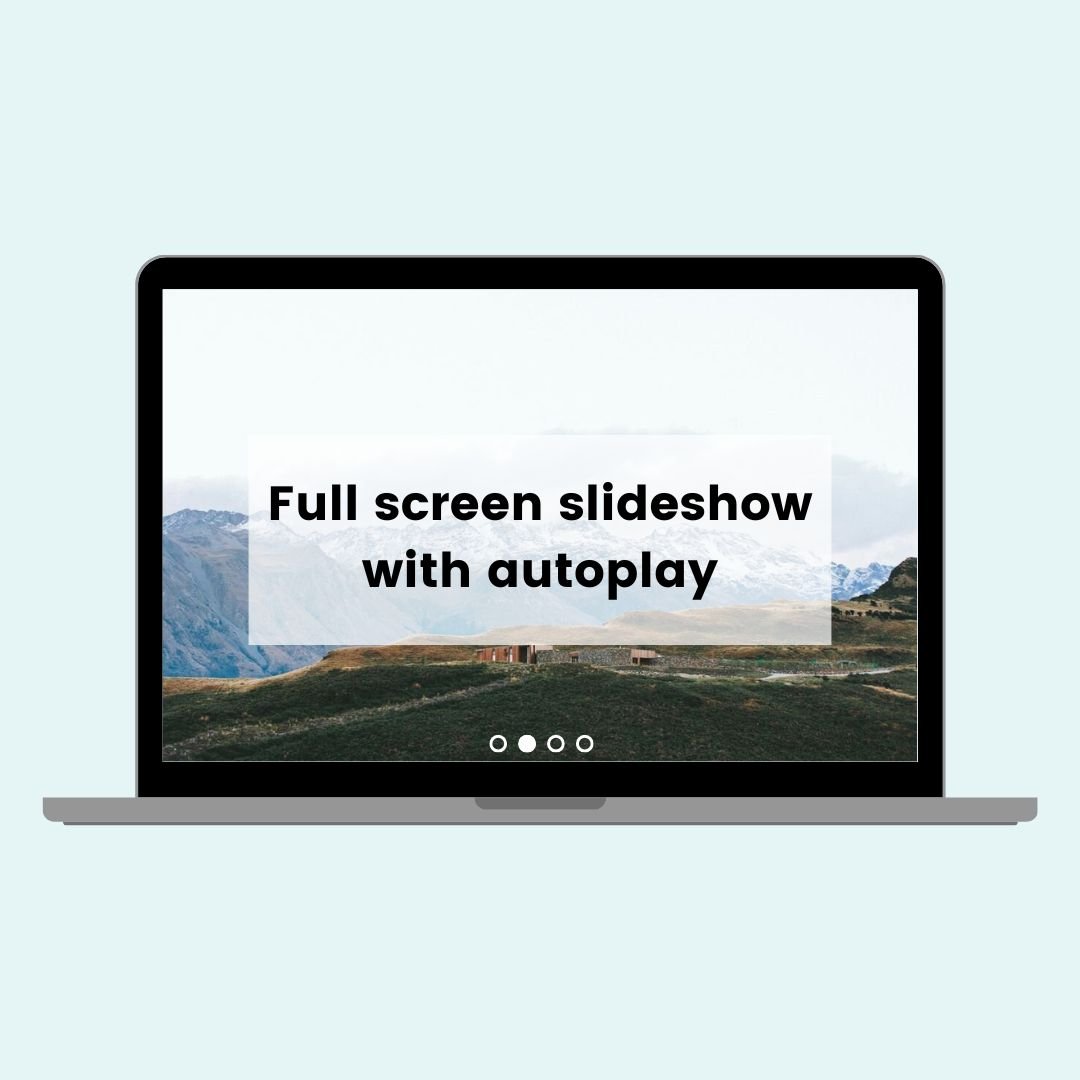
There are three different styles you can choose from, depending on the vibe you’re going for. First, there’s the autoplay image-only slideshow, which scrolls through full-screen images automatically, perfect for showcasing photos, portfolios, or brand visuals.
Second, I’ll show you how to layer static content (like text and a button) on top of those scrolling images. For this technique, we’ll use a bit of CSS to gives you a polished landing page with a bold call-to-action right up front.
And finally, you’ll learn how to create a banner-style slideshow where both the image and the content change with each slide—a great choice for multi-service sites or storytelling-style homepages. This one doesn’t have an autoplay feature, but it can be a great choice for anyone with a lot of content that they want to feature!
Watch the video below to follow along with the tutorial, then scroll down for all the info you’ll need to make any one of these layouts work for you.
Important update: Squarespace made changes to the program menu in May 2025. If your menu looks different than the video, press the / key to open the program search and search for Custom CSS to navigate there directly.
Hello, World!
✨ Quick Steps for Each Slideshow Technique
🎞 Option 1: Autoplay Slideshow with Images Only
This is the easiest way to create a cover page slideshow—just images, set to scroll automatically.
Click Add Section and scroll to the Images category.
Choose any Gallery section with the little slideshow icon.
Click Edit Section and set the Type to Slideshow Full and the Height to Large.
Toggle Autoplay ON and pick your animation style.
Click Edit Gallery to upload, rearrange, or link your images.
Hide arrows or dots if you want a super clean look.
In Page Settings, turn off the header and footer for that true “cover page” vibe.
📝 Option 2: Autoplay Slideshow with Static Text on Top
Want text and a button on top of your slideshow? This version combines a gallery with an overlapping content section and just a pinch of code.
Follow steps 1–5 from Option 1 to create your autoplay image slideshow.
Then click Add Section again and choose any fluid engine layout you want to use
Set the Section Height to Large and remove the divider.
Head into your Page Settings → Advanced, and paste the following CSS code; this moves the text section on top of the slideshow below it.
<style>
#page .page-section:nth-child(2) {
margin-top:-100vh
}
#page .page-section:nth-child(2) .section-background,
#page .page-section:nth-child(2) .section-border{
 background:transparent!important
}
</style>
Pro tip: To edit your images, just temporarily remove the code, and add it back when you’re done.
🧠 Option 3: Slideshow with Changing Text + Image
Perfect for sites with multiple services or storytelling content—each image has its own headline, text, and button.
Click Add Section and go to the People category.
Choose a section with the slideshow icon—don’t worry about the layout; you can tweak it.
In Edit Content → Design, select Banner Slideshow.
Under Size + Space, set the Minimum Slide Height to Large.
Customize each image, text, and button to match your message.
Want to hide slide titles? Just toggle them off in the Elements tab.