4 Creative Codes to Customize Squarespace Event Pages
Squarespace event pages may feel a little limited, but with a few clever codes, you can make them look and function exactly how you want. In this tutorial, I’ll walk you through four CSS codes you can use to add more style and functionality to your event pages.
Watch the video below to see these codes in action, and then scroll down to grab the snippets you’ll need.
What you’ll learn in this tutorial:
How to make event details sticky so they stay visible while scrolling
How to display a time zone next to your event time
How to transform “add to calendar” links into clickable buttons
How to hide pagination links at the bottom of event pages
Pro tip: in the video, I’m adding custom code to the Page Header Code Injection area of an individual page. If you have a personal/basic plan, you wont be able to access that feature, but you can use a code block! Add the same code to a code content block on the page itself and that code will only load on that page. Place it near the top, and make sure you have display source code toggled off so it’s invisible to visitors.
Sticky Event Details
Want to make sure your visitors always see the important info about your event—like the title, date, and time—even as they scroll through the page? This CSS will “stick” that event data to the top of the screen on desktop and tablet, so your audience never loses track of the details.
/* sticky event info - only on desktop & tablet */
@media only screen and (min-width: 640px){
.eventitem-column-meta {
  position: sticky;
  top: 16px;
  align-self: flex-start;
}
}
2. Add a Time Zone to Your Event Time
If you host online events or have attendees across different regions, adding a visible time zone can save everyone a ton of confusion. This quick code appends your preferred time zone (PST, EST, GMT, etc.) right after the event time. Just update the letters between the quotation marks to match your needs.
/* event time zone */
.eventitem-meta-item .event-time-localized:after{
content:" PST"
}
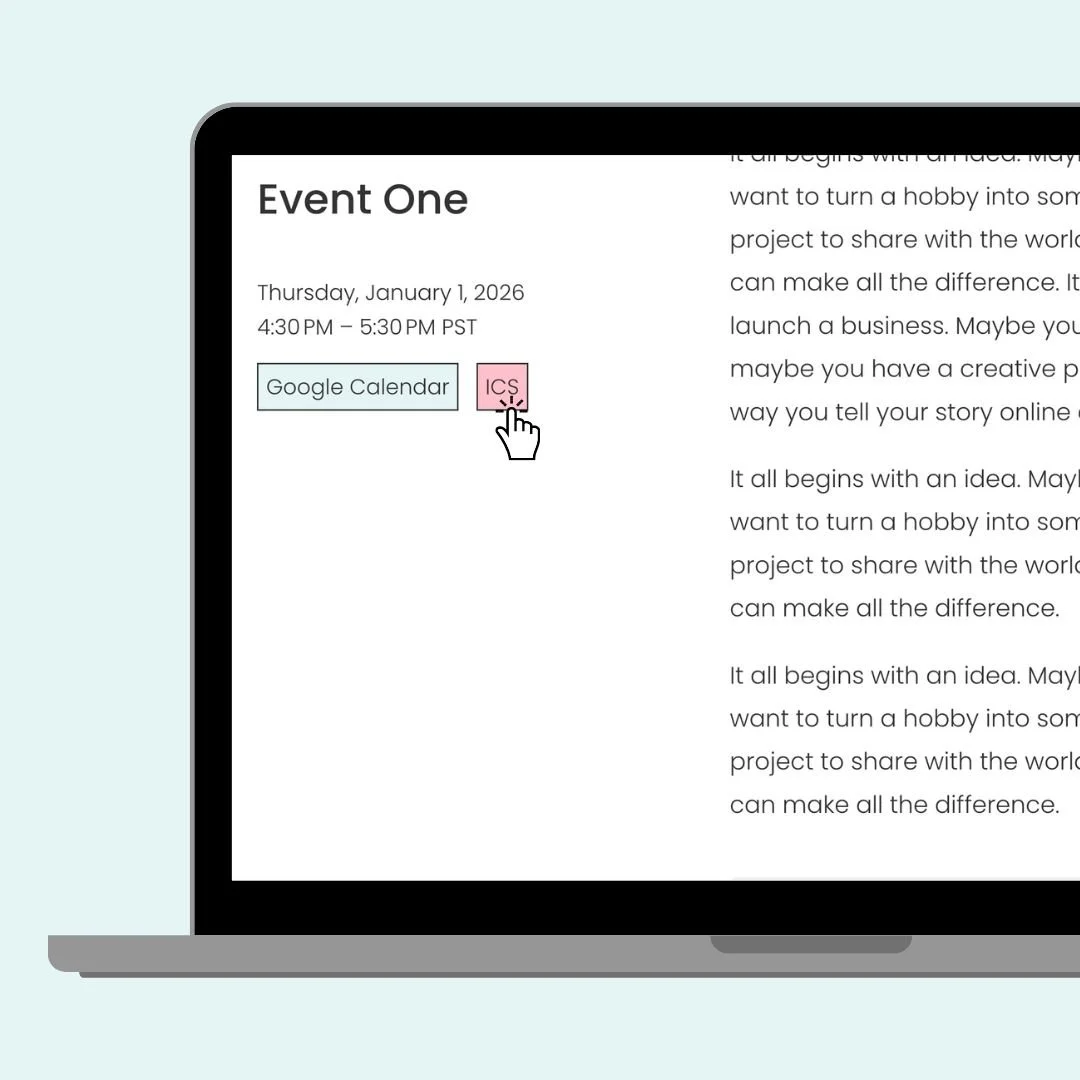
3. Turn “Add to Calendar” Links into Buttons
By default, Squarespace gives you plain text links for adding events to a calendar. This CSS transforms those links into buttons with padding, borders, and a hover effect—making them much more noticeable and clickable. You can customize the colors and styles to fit your site’s design perfectly.
These buttons have unique colors and borders and I have some extra resources about each that you can check out:
/* turn calendar links into buttons */
.eventitem-meta-export-divider:before{
  display:none
}
.eventitem-meta-export a{
 background:#e5f5f6;
 padding: 5px;
 border:1px solid #333
}
.eventitem-meta-export a:hover{
  background:pink
}
4. Hide Event Pagination
At the bottom of event pages, Squarespace often displays pagination links to the previous or next event. If your events aren’t related—or you simply don’t want to show those links—this code removes them entirely. Bonus: it only applies to event pages, so your blog or other collections won’t be affected.
/* hide event page pagination */
.item-pagination[data-collection-type="events-stacked"] {
display:none
}
And there you have it: four easy ways to customize your Squarespace event pages with just a little CSS. From keeping the details visible on scroll to adding time zones, styling those calendar links, and even hiding pagination, these small tweaks can make a big difference in how your events look and function.
Remember, you can adjust the colors, padding, or styles in these codes to match your own brand design; it’s totally up to you. Copy, paste, and play around until you create the look that works best for your site.
As always, I’d love to hear how you use these codes! Drop a comment below if you have questions or if you customized one of the snippets in a fun way. And most importantly—have fun with your Squarespace website. 💛