Link in Bio Alternative: Build Your Own Social Media Landing Page in Squarespace
If you’ve ever used a “link in bio” tool to connect your audience to multiple links, you know they don’t always match your branding, and they keep traffic off your site. With Squarespace, you can create your own custom social media landing page that lives on your domain.
That means you’re in charge of the content, the design, and the analytics. You can add buttons, newsletter forms, images, videos; whatever makes sense for your business. Plus, since it’s on your website, you can keep important links like your terms and privacy policy visible for a polished, professional touch.
Watch the tutorial below, then scroll down to grab the steps and code you’ll need to set this up on your own Squarespace site.
Pro tip: in the video, I’m adding custom code to the Page Header Code Injection area of an individual page. If you have a personal/basic plan, you wont be able to access that feature, but you can use a code block! Add the same code to a code content block on the page itself and that code will only load on that page. Place it near the top, and make sure you have display source code toggled off so it’s invisible to visitors.
Steps to Create Your Own Social Media Landing Page in Squarespace
Step 1: Create a new page in the “Not Linked” section
Inside your Squarespace dashboard, head to Pages and scroll down to the “Not Linked” section. Click the plus sign and choose Blank Page. Give it a clear title like “Social” so you’ll recognize it later. Keeping it in “Not Linked” means it won’t show up in your main navigation, but you’ll still be able to share the direct link anywhere.
Step 2: Adjust your page settings
Click the gear icon next to your new page to open the settings. Under Navigation, turn off the header so people focus only on the links you want them to see. I recommend leaving the footer turned on so your terms and conditions, privacy policy, or disclaimer remain visible—this adds a professional touch and keeps important info accessible.
Step 3: Clean up extra footer content with CSS
If your footer has sections you don’t want showing, you can hide them with a little CSS. First, give that section a unique name (like footer-nav) using the section editor. Then, in your page settings under Advanced → Page Header Code Injection, add this code below. This hides the extra section while leaving your legal links visible.
<style>
#footer-nav {display: none !important;}
</style>
Step 4: Add your first content section
Click Edit Page, then select Add Section. You can start with a blank section or choose one of the pre-designed layouts. I recommend a lighter background color to make your buttons and images pop.
Step 5: Add your logo and link it back to your homepage
Insert an Image Block for your logo at the top of the page. Once it’s uploaded, link the image to your homepage. That way, visitors can easily return to your main site with a single tap.
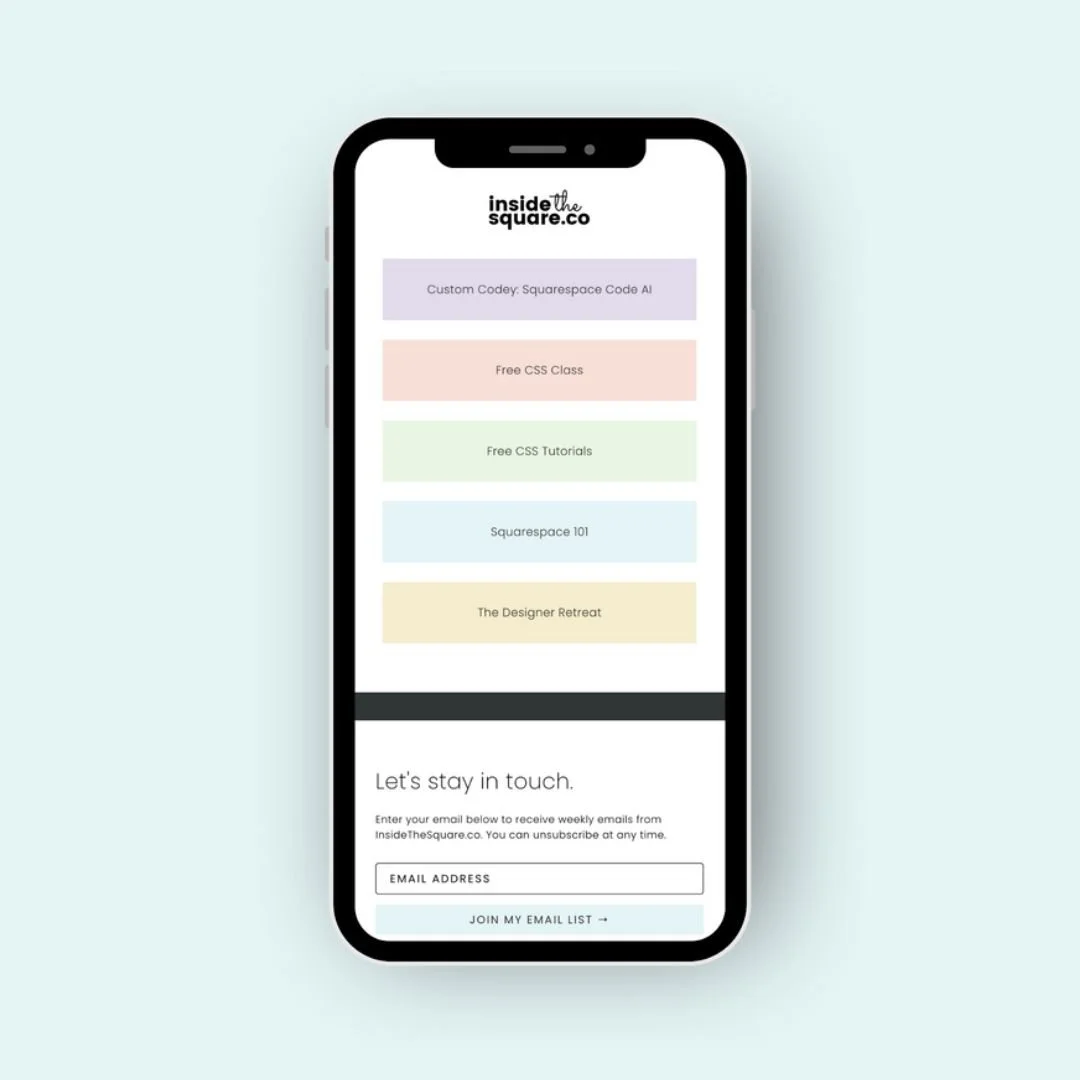
Step 6: Add buttons for your most important links
Click Add Block → Button to create buttons that link to your shop, services, blog, or current promotion. You can adjust the size, text, and layout to fit your style. For example: one button for “Shop Now,” another for “Contact Us,” and a third for “Current Specials.”
Step 7: Add a newsletter signup form
Use the Newsletter Block to let people join your mailing list right from your social page. You can connect this block to your email marketing service (like Squarespace Email Campaigns or Flodesk) in the block settings. This is one of the easiest ways to turn casual visitors into long-term subscribers.
Step 8: Customize with images, videos, or other content
Add more content blocks as needed—like an image that links to a featured blog post, or a video introducing your brand. You can really make this page reflect your personality and style.
Step 9: Optimize for mobile view
Most visitors will land on this page from a phone, so click the Mobile View icon in the editor to adjust the layout. Rearrange buttons, resize images, and double-check the newsletter block to make sure everything looks great on smaller screens.
Step 10: Set your custom URL slug
Back in the page settings under General, update the URL slug to something simple like /social. That makes it easy to add to your Instagram, TikTok, or other profiles—plus it’s easy to remember.
Wrapping Up
With just a few quick steps, you now have your very own social media landing page hosted on your Squarespace site. No third-party apps, no extra subscriptions; just a page that’s fully yours to design, update, and track with your own analytics. It’s one of the simplest ways to keep your brand consistent and make sure all that social media traffic leads straight back to your website.
✨ Pro tip: This is not legal advice, just what I do - Don’t forget to keep those important links (like your terms and conditions or privacy policy) visible in the footer. It’s a small detail that makes your site look more professional and protects your business at the same time.
If you need templates for disclaimers, terms, or policies, I highly recommend The Boutique Lawyer. That’s where I get my own. You can use my affiliate link to save 10% or more on your purchase: insidethesquare.co/boutiquelawyer
Affiliate link means that if you make a purchase after clicking that link, I may receive a small commission for sending you their way. Thanks for your support!